CreationView.com
by Joseph LaQuiere

"Declaring the glory of God
through photography of His created world"
Recent Work | Violins | Birds | Creatures | Still Life | Metro Parks | Family Photos | Featured Photos | Featured Galleries
  copyright 2007 by Joseph LaQuiere
Homepage | What's New | Articles | Reviews | About | Gear | Purchase Prints | Rentals | Contact  | Links | Contents 
HP Photosmart Pro B9180
August 20, 2007
A personal or professional Pigment Ink photo printer
for medium size prints up to 13X19 (A3+)


A Personal First

It has now been about 3 weeks since I first laid eyes on my new HP Photosmart Pro B9180. This is my first entry into a professional Pigment Ink Printer. The InkJet printer has become the modern tool for professional fine art photographers and printers, replacing any other process, and along with Photoshop, have completely replaced the most sophisticated chemical process darkroom.  Many beginning photographers and photo hobbyist have yet to realize the power and capability that is now available to them on their desktop.  Among my friends it is not uncommon for someone to be surprised that the preferred way to produce a quality print is not to go to a photo lab but, at home, with an InkJet.  Today, even with the most basic and inexpensive InkJet printers, you can customize and turn out wonderful prints that exceed any lab print.  This is not to say that it is not without it's frustrations as color matching and profiling can be tricky and you can do a lot of tweaking to get that print to come out just the way you want.  But the rewards are very satisfying and the results are much quicker and much less costly than, what at one time, you could only have had with a lot more expertise and a very expensive darkroom.


Prints for the Common Man

My personal experience with any type of print process has been limited; never having had a color darkroom and only a small bit of experience developing black and white prints as a teenager.  So my perspective in this review and on printing in general is that of the common man.  I have been InkJet printing now for about 5 years with Canon printers and have most recently been using the Canon I9900.  This limits my personal experience with InkJet printing as I have never had any of the most notable photo printers from Epson, which has been the leader in this technology.  In this review I hope to introduce you to InkJet printing in general and give you a short synopsis of my experience with the B9180.


What is an InkJet

Let me start by giving you a basic introduction to what an InkJet printer is.  The idea is simple with a moving head that travels across the paper and as it does it sprays different colored dots onto the paper to create the color patterns that make up the print.  InkJet paper is also special and has a coating that controls the absorption of each droplet and has a big effect on the quality of the print as well as the longevity.  The life span of the InkJet print has been one of the biggest problems and created somewhat of a black eye for InkJet printers as up until recently the fade resistance of InkJet prints has been very poor.  Many of us can remember seeing our first InkJet photo and marveling at what came out of that box on the desk but then being aghast at seeing the print fade horribly even within a few weeks.  Well forget all your old impressions folks, the inks, printers and paper have improved a great deal in the last few years. 


200 Year Fade Resistant Prints

There are two types inks used now in InkJet printers, the most common is Dye based and the other, more rare variety and only recently available, are printers based on Pigment ink.  Pigment ink printing was developed by Epson as a much more permanent and fade resistant medium than Dye ink.  The easiest way to remember the difference is that Dye Inks "die".  The longevity on current Pigment prints ranges upwards of 100 years  with HP claiming 200+ years on their inks and papers, under glass and 100+ years open air.  With numbers for fade resistance and colorfastness well over 100 years the Pigment InkJet print has become the archival choice for print endurance surpassing nearly any other process.  Along with Pigment ink however the Dye inks have also improved their fade resistance numbers to around 30 years for common papers.  In my personal experience with my Canon I9900 in three years of use I have seen only a minor amount of fading from most of my prints.  But the idea of a print looking nearly as good as the day I printed it throughout my lifetime is incredible.  So it was with this hope that I have been anxiously watching the printer field and anticipating each new printer.
Canon and HP have both been playing catch up to Epson with their Pigment ink printers and pigment ink has it's own unique problems, primarily in how the ink lays on the page.  Because we are dealing with pigment, which means it has  opaque "pigment" particles, it does not respond as well to glossy papers and you can see dull or shiny variations when a print is held at the right angle to the light.  This is called  "Gloss differential".  Another aspect of pigment inks is that they tend to be subject to more color shift in different lighting conditions than Dye.  This is called "Metamerism" and is a result of the different pigment colors reflecting light differently.  In general these problems are minimal and have been addressed quite well in this new HP B9180.  If however you are a gloss fanatic you will be wowed by the impeccable glossy finish that you can get from a Dye based printer but your enthusiasm may be short lived as the print begins to fade.


Wet Pigment!

While a lot of improvement has been made in the Dye based ink printers, and Canon has new printers out now with better Dye ink than my I9900, it is hard to conceive that Dye Ink will ever reach the life span of Pigment.  Because of this I have been watching the field to determine when I would jump in and get a Pigment printer.  I was keenly interested in Canon's IPF5000 and the printers from Epson but so far the prices have been high.  Last year along came the announcement of the HP Photosmart Pro B9180; at a shocking barrier breaking list price of $699 and in the last 6 months other A3+ printers have been announced from both Epson and Canon. But it is HP that has lowered the bar on affordability and raised the bar on performance with the HP Photosmart Pro B9180.  For the most part reviews of the B9180 have been glowing and I was spurred to make my purchase after discovering an HP offer for a $100 upgrade credit if you already owned a 13" or larger printer.  With a street price of $587 and the upgrade credit the final cost of the B9180 came in about $487, a price,  too good not to get my feet wet in Pigment Ink!
There are many reviews detailing every aspect of this printer  and I won't go into it all here but how did it go for me? I will give you my initial experience and impressions.


The Fine Art Of Print Making

The process of print making remains and always will remain a fine art.  From the beginning stages of processing a photo in a program like Photo Shop to the final matting and framing it all adds up to an artistic and technical endeavor.  The B9180, for me, has made the printing process more successful and given me the comfort that my effort can be displayed, without a glass, for a very long time without significant worry about the print fading.


The First Three Weeks  (notes on the HP B9180)

Many of the reviews raved about how easy and trouble free the installation went.  Well to start off, with the good part, the printer arrived nicely packed in a generous box and the instructions were detailed and clear.  But the rest of my installation did not go as smooth as most reviews had indicated. 


To Swab or Not to Swab?

The initial setup of the printer requires removing a number of pieces of shipping tape and then installing the ink and print heads.  It is in the installation of the print heads where there was a bit of confusion. The setup procedure indicated that there should be swabs packed with the heads.  According to the setup guide you were supposed to use these swabs to wipe the heads off  prior to installation. Look as I might, I could find no swabs anywhere.  Fortunately HP has an online chat help option that is available 24 hrs.  Since I was doing this installation at 11:00pm I decided to try the online chat.  I did receive a quick connection and they did inform me that they no longer were putting swabs in the packages and I could bypass that part of the installation and simply open the packages and install the heads.  The printer then instructs to load the supplied pack of paper and proceeded to the auto calibration.

Once I was over the issue of the swabs and the calibration was complete it was on to the driver installation.  I installed the printer onto my upgraded Windows Vista laptop and here I ran into a small problem.  I cannot say if the  problem was with windows Vista or the HP driver or perhaps just a specific issue with my particular hardware.  The problem with the driver installation came when trying to install the network portion of the driver.  The installation would halt and I had to choose "Retry" three times before the installation finished.  After this little glitch the rest went ok but I will say that the installation of the drivers and software is SLOW  it took me over a half hour to install the software and start to print.


Three Highlight Features

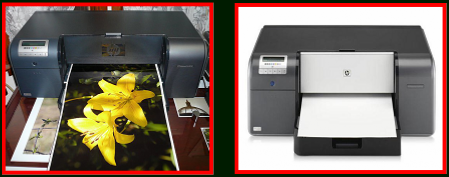
Before I get to the printmaking let me highlight the B9180s most outstanding features.  The most obvious is the new VIVera pigment ink from HP that claims 200+ years on certain papers.  The second outstanding feature, that comes built into the HP B9180, is a built in LAN Network card which means that if you have a LAN in your home or office you can connect via Eathernet to the B91890 and have access to the printer from any network connected computer.  This feature is often an option, if available at all, for extra cost.  I especially find network support very advantageous because I work almost exclusively from a high powered laptop and often wirelessly.  If my B9180 is plugged into the network I have the ability to print to it while maintaining the mobility of my laptop.  And the third, most notable feature, is the auto Calibration.  This is a process that is automatically initiated when setting up the printer for the first time and manually at any time the user desires.  What does it do?  Well, my understanding is that it set's the printer to a standard color output for color consistency by printing color targets and using built in Densitometric sensors to measure the actual color output and calibrate this to a predefined standard.  This process is initiated after changing print heads (which are user changeable) and HP recommends executing the process "periodically"


Prints In The Making

With the printer setup and the software installed I was now ready to produce my first prints.  I almost always print from Photoshop  so I started by printing my first print direct from Photoshop. I chose initially not to use the supplied Photoshop plug-in (which I came later to find out is very handy) and print using my normal print routine like I do with my Canon I9900.  I also opted to use "Printer Managed" color instead of the more sophisticated "Photoshop managed" option and the HP supplied  profiles.  This would give me an Idea how the printer would preform right out of the box in it's most basic and easy to use configuration.  I made my first few prints on the supplied Hp Advanced Glossy paper.  The prints were nice and quite neutral but also they were lacking the pop that I was used to from my I9900.  They had fine resolution but I must say that visually they were a bit disappointing.  So I started to experiment and adjust the print in Photoshop to produce a more similar match to the I9900.  After a few prints I was able to make adjustments that would produce a very nice print.  I did notice that shadow detail was better than anything I have been able to get from my I9900.  Bear in mind that was just using the most basic print settings and letting the printer manage color.


A few frustrations

After the first few prints I began to experience a few problems that took me some time to iron out.  The first thing I noticed is that if the printer paused during printing, for more than a few seconds, a visible overlap could be seen in the print where the printer had paused waiting for more data.  This showed up as a slightly darker band in the print about 1/2" wide.  With my Canon I9900, and other dye printers, I never noticed a problem in the output if the printer had to pause for more data and I would freely use the computer during printing.  With the HP B9180, and I suspect other pigment printers, if the printer pauses long enough the dry ink and the fresh ink do not blend seamlessly.  I found this to be the case across the board with any paper; however some papers were less noticeable. My conclusion on this issue is that you need to have a computer powerful enough to keep up with the data flow and minimize any background operations so that the print output does not get interrupted.

My next issue appears to be related to Windows Vista, the HP Vista driver and or my computer hardware.  My laptop is a 1.7ghz Pentium with 1.5gb of ram  and when I started to print out 13" 19" prints I found that if I sent the printer a print with a resolution greater than 280 PPI the print would get ejected from the printer with about 1/5th of the page un-printed.  When trying to solve this issue I tried printing the same print from a Windows XP machine with 2gb of memory and had no problems.  The good news is that, to the naked eye, it is very difficult to see any improvement in a 13x19 print between 184 PPI or 300 PPI.  Again remember that this is just FYI and you should not draw any conclusions regarding this with respect to Vista machines.  I only have tried this on my one Vista upgraded laptop and I did not have any trouble print from a Windows XP machine.

I also found it frustrating to try to cancel a print that had been sent to the printer.  It seems that just trying to select cancel from the print manger did nothing nor did it seem to do anything if I pressed the cancel button on the printer itself except to eject the loaded page.  The only thing that was effective in clearing the print queue was to go to the Windows services manager and find the "print spooler" and start and stop the service and repeatedly press cancel in the print status dialog box.


Great Prints!

Finally after working thru and understanding a few of the idiosyncrasies of the B9180 I started to get down to the business of just producing prints.  HP includes with the printer a Photoshop Plug-in that makes it easy to use Photoshop managed color along with the included HP profiles.  Here is where the B9180 began to realy show it's colors.  My first print using the Hp profile was outstanding.  Color was very neutral and balanced and shadow detail was excellent.  I soon was able to produce prints quickly and to my taste with just one proofing print and then the final print.  I would still say that the Canon I9900 has a bit more pop however the prints from the HP are more consistently color correct and neutrally balanced where the I9900 tends to exaggerate colors especially in the reds.  I do have to correct prints upward in saturation and contrast somewhat to avoid a flat print coming from the HP but I would much prefer to do this than to have prints come out over done. The Photoshop plug-in makes it very easy to use profiles and set the correct printer settings which can be a little obscure when going through the standard Photoshop dialog boxes. 
__________________________________________________________


What Is A Print Without Paper?
Any print is only as good as the paper it is printed on and there are a myriad of choices available.  Many fine art photographers like flat paper but I have become very fond of the low sheen or satin papers.  There is one particular paper that I have come to like very much it is "ILford Galerie Smooth Pearl".  I have been using this paper for several years and it makes a wonderful looking print with a low luster finish that looks very professional.  It is very reasonably priced and I have also experienced good fade resistance with my I9900 dye prints using this paper.  I have a nice supply of the Smooth Pearl in various sizes so of course when I started to use the B9180 one of my big questions was "How will my favorite paper work".   Contrary to some reports that I have seen around the web the Ilford Galerie Smooth Pearl works fabulous with the HP B9180 and is nearly identical to the HP Advanced Soft Gloss and works well with the same settings.  HP also offers a complete selection of very nice papers and while I did not try all the available HP papers if I had to stick with just the HP branded papers I could be very happy.

I tried several papers that I had on hand as well as several of the HP papers.  Here are my  findings.

ILford Gallerie Smooth Pearl 250gsm:
This has been one of my favorite papers it has a very fine soft luster, the texture and feel of the paper in hand is excellent and very professional.  I have had great success with this paper on my I9900.  I am very happy to say that this paper preforms exceptionally well with the HP Photosmart Pro B9180.  The look, feel and color are nearly identical to the HP Advanced Soft Gloss paper. Use with the [HP Advanced Photo Paper, Soft-Gloss] settings.

ILford Gallerie Smooth Gloss 250gsm:
Again this paper preforms very well with the B9180 and is very similar to the "HP Advanced Glossy" paper.  These two papers are virtually indistinguishable.  The Ilford may have a bit better gloss and a smoother surface but the difference is very slight. Use with the [HP Advanced Photo Paper, Glossy ] settings.

Epson Premium Semi Gloss Photo Paper:

Finish and texture very similar to both the ILford Smooth Pearl and the HP Soft-Gloss.  No problems with this paper.  Use with the [HP Advanced Photo Paper, Soft-Gloss] settings.

Epson Enhanced Matte:
This paper has been a favorite among fine art printers for a long time and early on became the standard for fine art printing.  In recent years it has become eclipsed by a number of other excellent matte fine art papers from numerous manufactures and is now replaced in Epson's line up with what is called Epson Ultra Smooth.  The Enhanced Matte preformed excellently with the B9180 and yielded a beautiful completely matte print with great color and exceptional detail.  I printed this paper using the [HP Hahnemuhle Smooth Fine Art Paper] settings.

Epson Matte Paper Heavy Weight::

Another popular paper from Epson very similar to the Enhanced Matte and worked well with the B9180.  I also printed this paper using the [HP Hahnemuhle Smooth Fine Art Paper] settings.

Canon Photo Paper Plus, Semi-Gloss

I only tried this in the 4X6 size but it worked well and looked very similar to both low sheen papers from ILford and HP. Use with the [HP Advanced Photo Paper, Soft-Gloss] settings.

Canon Photo Paper Plus, Glossy:
This paper was the only one out of my selection that did poorly on the B9180.  The prints looked dull and you could see a lot of gloss differential in many areas.  It appears that the HP Pigment ink and the Canon Glossy coating do not work well together.

HP Advanced Photo Paper, Soft-Gloss
This is an exceptional paper a direct replacement for my favorite ILford Smooth Pearl no problems whatsoever with this paper and am thrilled with the result.  It would appear that this is identical to the HP "Satin-Matt" but in 8x11.5" size.  Use with the [HP Advanced Photo Paper, Soft-Gloss] settings.

HP Advanced Photo Paper, Satin-Matt:
Same as above but in the 13"X19" size.

HP Artist Matte Canvas:
Canvas paper is a very specialized media most often used for fine portraiture.  The look of the finished print mimics an oil painting on canvas.  I printed several prints on this paper with exceptional results.  The prints looked every bit as outstanding as those from a professional lab.  It has been my experience with inkjet canvas prints that they are delicate to handle and show scuffing easily. I have also noticed that with canvas sometimes coating particles will adhere to a fibre on the canvas and after printing flake off leaving behind a tiny white spec.  This can be eliminated by brushing the surface of the canvas with a completely clean and solvent free nylon brush and then lightly dusting with canned air just prior to printing.  Canvas prints also need to be top coated to avoid marking and handling damage.  Leave the print in the air over night then use an artist spray (such as for coating acrylic or water colors) and give the print two light coats.  I use Krylon Kamar Varnish with excellent results.  After this treatment the print becomes very durable and you do not need to worry about marking the print when mounting and framing.  Canvas will also need to be mounted to a board or on a stretcher frame to allow framing.  I use a foam core board and a compatible photo mount spray adhesive.  One other thing I noted when printing on the HP canvas with the HP profile is that shadow detail is easily lost and the print is much darker than on normal photo papers.  You will find that you will need to lighten up the print significantly to achieve the same look as on paper. Use with the [HP Artist Matte Canvas] settings.

Note: The HP Premium papers are not recommended by HP for the B9180 and indeed when I was forced to buy a package of the Premium Plus for a project that I was on the road with, I found it some of the worst paper, other than Kodak, that I have ever used.  The surface is sticky feeling the prints feel plastic and the ink beads up on dark areas.   I was using it with my Canon i950 and thought I would try a sheet with the B9180 and the results were about the same.


A Note About B&W Printing
Many people are very interested in the Black and White performance of a printer and on that score I have to refer you to other reviews.  I do some B&W printing but do not have the experience nor the eye for B&W prints to make good judgments on how well the B9180 does.  I will say that I have been very happy with the B&W prints that I have done and see nothing lacking in the B9180s ability.  One of the big advantages to the HP over the Epson competition is the fact that Epson has a system that requires you to change black ink cartridges for gloss or matte prints.  The HP B9180 uses only 8 inks and has both gloss and matte black available at the same time.


Conclusion
After a few initial concerns, glitches to work through and early on disappointment with the output I have become very enthusiastic about the HP Photosmart Pro B9180 and have no regrets in the purchase.  When using Photoshop managed color and the included HP profiles I have repeatedly produced outstanding output.  The prints have a very professional look and a natural color balance with minimal tweaking.  For any given photo, my canon I9900 seems to have more color saturation and pop but I have never been able to achieve the shadow detail and natural look to my prints that I now can with the HP B9180.  As I said earlier when judging gloss prints based just on gloss alone the I9900 is the winner here, but beyond that, the HP excel's in every other way.  Yes I have had a few issues and I do not think the Windows Vista driver is quite up to snuff but in the end I am VERY happy with the B9180 and would recommend it to anyone looking for professional quality output and archival longevity of the prints.  I have only written a small fraction of what I could regarding this printer or photo printing in general and I only know a tiny fraction of what there is to know.  But there are many fine reviews and articles about this printer and printing in general by those much more qualified than I.  I encourage you to do more reading on your own and check out the links at the bottom of this page for more information.


"In the end I am VERY happy with the B9180 and would recommend it to anyone looking for professional quality output and archival longevity of the prints."


I purchased my printer from ITSUPPLIES and recived great service and prompt shipping.

Other Reviews
Luminious Landscape and Michael Reichmann's review
InkJet Art review
Mac World
Example of "Bug" in Photoshop Plug-In
Photoshop Plug-In Bug
Unfortunately there seems to be an odd bug that I have found with the HP plug-in.  When printing 5X7, in portrait mode, the printer will leave a very fine line about 1.25" from the top edge of the print.  I at first thought that it was something wrong with the printer or heads but if I go through the standard Photoshop dialog boxes there is no problem.  I did an Internet search and found several references to the same problem from other users.  The anomaly does not occur in the landscape orientation and for 5X7" prints I can rotate the picture to landscape just before printing.  I have also had it occur with an 11x14" portrait print and this size can only be printed in portrait orientation because the printer carriage is only 13" wide.  It is not a big issue to use the normal Photoshop print settings but means that you must set all the settings correctly in the PS dialog boxes.  The problem has not occurred in any other size or type of print.
Last update
December 10, 2007