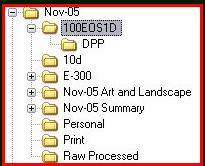
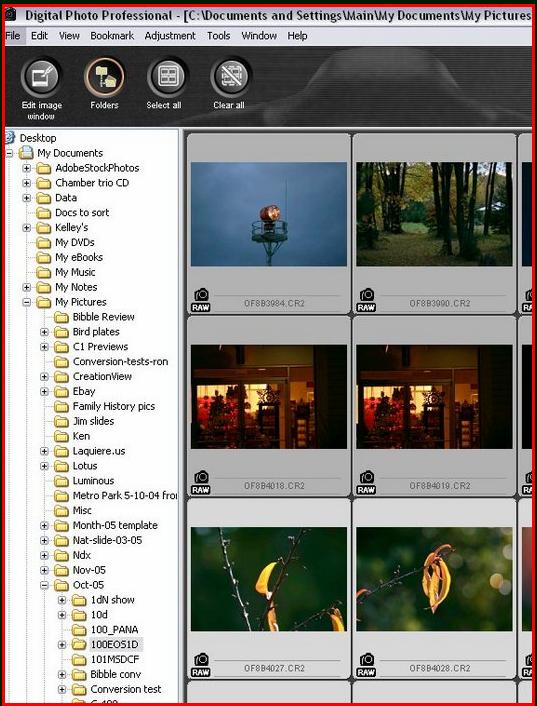
After I copy the files from the CF card, which I typicaly do from windows explorer, I switch to DPP. The main window of DPP opens. From the main window I navigate using the file tree on the left to my "100EOS1D" dir contianing my raw files. I now select two rows of thumbnails contianing aobut 18 images. One of the keys here is not to select too many at one time.
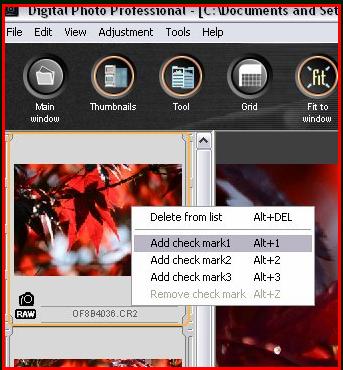
Once the selections are made I click on the "Edit Image Window". This brings up the edit view with the thumbnails you just selected on the left and a large version of the selected image on the right. If your window does not display this way click on the "Thumbnails" button to change the view. Make sure you also select the "Tool" button to have the adjustment tools displayed on the far right. I now work through the images from top to bottom and as I select each one I judge composition and exposure. DPP allows tagging images with numbers 1-3. I make use of this to mark the the images I want to delete and save. If I determine that I do not want an image I will tag it with a "1" by using Alt+1 after I tag it I right click on the thumbnail and select "Delete from list". On the images I want to keep I make the necessary adjustments and continue to move through the group not taging at this time. It is important to note that you must remove the images that you do not want to process from the editing window. DPP will process everything that appears in the left list of thumbnails. Unfortunately DPP does not allow you to delete an image completely, in this view, but only remove it from the list. This is why it is important to add the #1 tag to the image before deleting it from the list so that you know which ones to delete when you get back to the Main window.
There are two ways to handle the images that are kept and processed. One is to tag them as you go, I use a "3" for images to save. The other way, and the one I use, is to work through the whole list then I click on the "Batch process" button and select the proper settings, dir location and start the processing of the images. After the batch process starts you can click on the "Main window" button and you will be returned to the Main view. IT IS VERY IMPORTANT AT THIS POINT NOT TO CLICK ON ANYTHING UNTIL YOU TAG THE IMAGES THAT WILL STILL BE HIGHLIGHTED. These are the ones you choose to keep in the edit view. You can add the tag by selecting Alt+3. If you click with the mouse before adding the tags you will deselect the images and may loose track of the ones that have been processed. At this point DPP will be processing the batch and you may select more images and continue the routine.
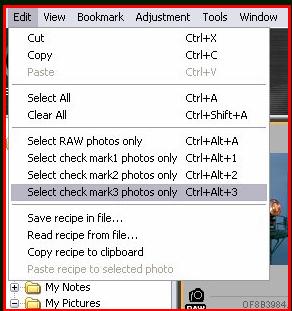
Once you have processed and taged a batch of images in this way, you may, from the main window, use the command under "Edit" to select the tagged ones and delete them or move them to "Raw Processed" directory.
Hopefully this will give you some ideas on creating a workflow, that works reasonably well, for many images in DPP.