CreationView.com
by Joseph LaQuiere

"Declaring the glory of God
through photography of His created world"
Recent Work | Violins | Birds | Creatures | Still Life | Metro Parks | Family Photos | Featured Photos | Featured Galleries
  copyright 2008 by Joseph LaQuiere
Homepage | What's New | Articles | Reviews | About | Gear | Purchase Prints | Rentals | Contact  | Links | Contents 
This is not meant to be a tutorial but just a few comments before you download my Photoshop actions.  I will first give a little simplified information about sharpening.  For some to use these actions and routines they will likely need to do some more reading.  And for the others I will assume some basic Photoshop knowledge.

First of all what is Sharpening and why do we need it?

There are a lot of factors that relate to perceived sharpness of a photo.  I will try to just give a very simplified explanation. Sharpness as we perceive it, in an optically well focused photo, is mainly seen as the difference in contrast between light and dark edges. When a photo has edges that are in high contrast to adjacent areas we usually see the picture as being sharp.  This edge contrast is what is most important in giving us the sense of sharpness, or the lack of which, gives us the feeling the image is soft.  Often a photograph that is low resolution and coarse in grain, when viewed at a distance will look sharper than one that is very high in resolution and very fine grained.  In fact the further we get from a picture the coarser and more contrast it needs to look sharp.  This is because a higher resolution photo has so much pixel information that the ultra high resolution actually appears to be soft, we cannot define the difference from one pixel to the next.  As digital cameras attain higher resolution and get better with less digital noise, more sharpening is needed to allow our eye to see the photo as being "Sharp".  This may sound a bit like going backward but it is the way it works.  Don't get me wrong, higher resolution allows one to see a tremendous amount of extra detail we just need to have the contrast of the edge pixels increased from the light to the dark to allow our eye to define the extra details and edges that are in a high resolution photo.  This is not a new concept and was necessary in traditional film based processing as well.
For much more detailed and better explanations of these factors look up the words "sharpening" "unsharp mask" "sharpness" "contrast" and "acutance" on The Luminous Landscape and read the excellent articles there. 

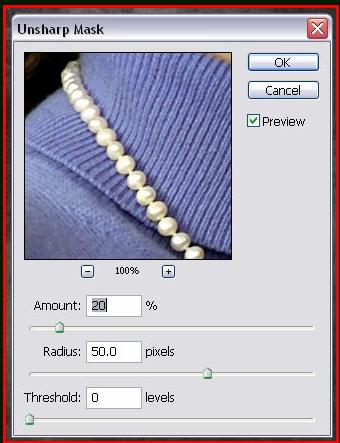
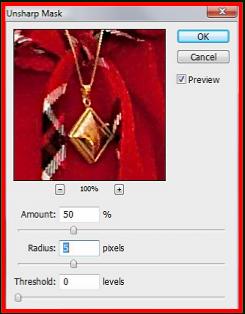
Fortunately for those not interested in advanced image processing All digital cameras apply sharpening to their JPG files when they create the image,  providing a finished photo as soon as the picture is taken.  But for us that use RAW files, convert afterward, then adjust the image in Photoshop we need to apply sharpening at some point in the processing to make the photo appear sharp and detailed.  Typically the best point for sharpening is at the very last step before printing or displaying the photo.  It is especially important to apply any noise reduction software before sharpening as the routines will identify the noise as parts of the picture that need to be highlighted from the rest and will sharpen those edges as well.
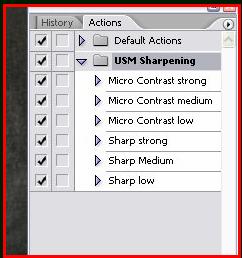
MY ACTIONS

I have used a number of different sharpening plugins and actions but so far have preferred my simple method to provide good results with minimal time. 

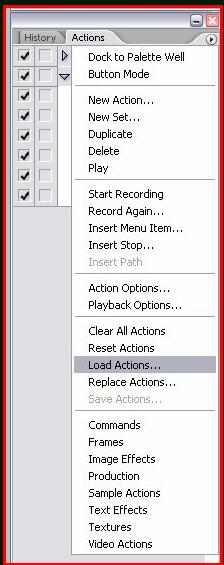
Sharpening is not a constant and varies with the photo, the Camera, the noise in the Image and the crop level of the image as well as the conversion software.  These routines were created after finding that I use a number of similar settings for my Canon 1d Mark II raw files.  I have also used these basic settings for several different cameras with good results.  The best results are obtained if the image is converted from RAW without any sharpening applied by the converter.  Based on my frequently used settings I have created an Action set that can be used in Photoshop which automates the basic routines.  These can be loaded into Photoshop with the "Load Actions" command. (see bottom of page)
Sharpening in Photoshop
SHARPENING

The next step is to sharpen using the values of Amount: 300%, Radius: .3 and Threshold: 0.
I will often apply this routine again adjusting the radius to .2 or perhaps using a value of .4 the first time.  Use some experimentation and create your own "Typical settings."

The final application is to use values of Amount: 32%, Radius: 2.9 and Threshold: 0  This also can be modified by changing the Amount and Radius up or down a little bit.  You can also experiment with adjusting the Threshold amount.


In the "Actions" that I have created I used these basic settings to create three levels "Strong" "Medium" "Low" for both Micro Contrast and Sharpening.  You can see the settings I used for each action under the action name by clicking on the arrow.   Each Action creates a snapshot afterward which you may select from the history list to jump between each use to see the changes.  Try playing with the settings and use the actions as guides to create what works for you.

MICRO CONTRAST ENHANCEMENT

I divide sharpening into three basic setting groups all using Photoshop's Unsharp Mask filter.  The first routine that I apply is not really sharpening but what I call Micro Contrast Enhancement.  Using the settings of Radius: 50 pixels, Threshold: 0 and adjusting the value of Amount between 5 and 20%  serves to remove, as it were, a haze from the image and causes it to "Pop".
Click to download Photoshop Action "USM Sharpening"
Click this link to view images with Sharpening and without

Custom Action "USM Sharpening"
Download Here >> Click to download Photoshop Action "USM Sharpening"
Roll mouse over the picture to see the effect of
Micro Contrast Enhancement
Micro Contrast Settings

Update!  I have also decided to make available another more sophisticated sharpening action set called the 10D Finisher. This action has been readily available free around the net and offers some nice results on certain images. I am not sure who is responsible for it's creation or I would gladly give credit.

Click to download "10D Finsher"
The action files need to be copied into the actions directory on your computer in order for Photoshop to find them.
Example: C:\Program Files\Adobe\Adobe Photoshop CS2\Presets\Photoshop Actions
Then in Photoshop use the "Load Actions" as pictured below.
"Load Actions"
DOWNLOAD ACTIONS
Additional information links

www,cambridgeincolour.com/tutorials/local-contrast

http://www.lonestardigital.com/photoshop_quicktips.htm

http://www.luminous-landscape.com/tutorials/contrast-enhancement.shtml
Otcober 05
Update! 7-06-06

As I am sure most of us do when we are keenly interested in photography, I am constantly looking for new tools to improve my work or make it easier, faster etc.

One such thing I have just discovered is a yet again a different way to sharpen in Photoshop.  This technique comes courtesy of Michael Reichmann and  The Lumininous Landscape .  I had seen this tip some time ago but never taken the time to put it to use.  I have, and I like the results and think it will become yet another tool to add to my growing list of useful tips and tricks for Photoshop.

Here is the routine:

First start out by going to the Layer palette, select your Background Layer and right click.

Now Select Duplicate Layer.  This will create a new layer called "Backround copy".

With this new layer highlighted select Filter from the menu bar at the top of the screen then / Other / High Pass. Set the Radius to 10 and click OK.

It is helpful now if you view your image at Actual Pixels level so you can see how the adjustments you are making affect the image.

Return to the Layer Palette and from the dropdown box at the top left select Hard Light.

Now using the Opacity Slider (on the right of the layers palette) adjust the slider down from 100 to a level of sharpening that gives you the desired result typically a value between 20% and 70%.

That's it.!
Note: For updates and additions to this article please see the end of the page
Update! 1-13-09

In using the Unsharp Mask  in PhotoShop you will find that some settings will produce better sharpening with some cameras and resolutions than others.  I currently am not use the actions but work by the seat of my pants manually using the basic routines above.  In addition to what is already on this page another favorite setting of mine is to somewhat reverse the settings and use an "Amount" of 50%, "Radius" of between 3-10 and "Threshold" of 0.